> For the complete documentation index, see [llms.txt](https://docs.allout.game/llms.txt). Markdown versions of documentation pages are available by appending `.md` to page URLs; this page is available as [Markdown](https://docs.allout.game/getting-started/testing-and-publishing.md).
# Building a Basic Game
To get you started, this guide walks you through building an apple collection game!
### Apple Collection
{% hint style="info" %}
This example game skims over details that are covered in-depth in other guides. If you need any help, check the left sidebar or use the search feature at the top for extra information!
{% endhint %}
#### Building the map
We'll start by creating a basic world with an island to walk on and an apple to collect later!
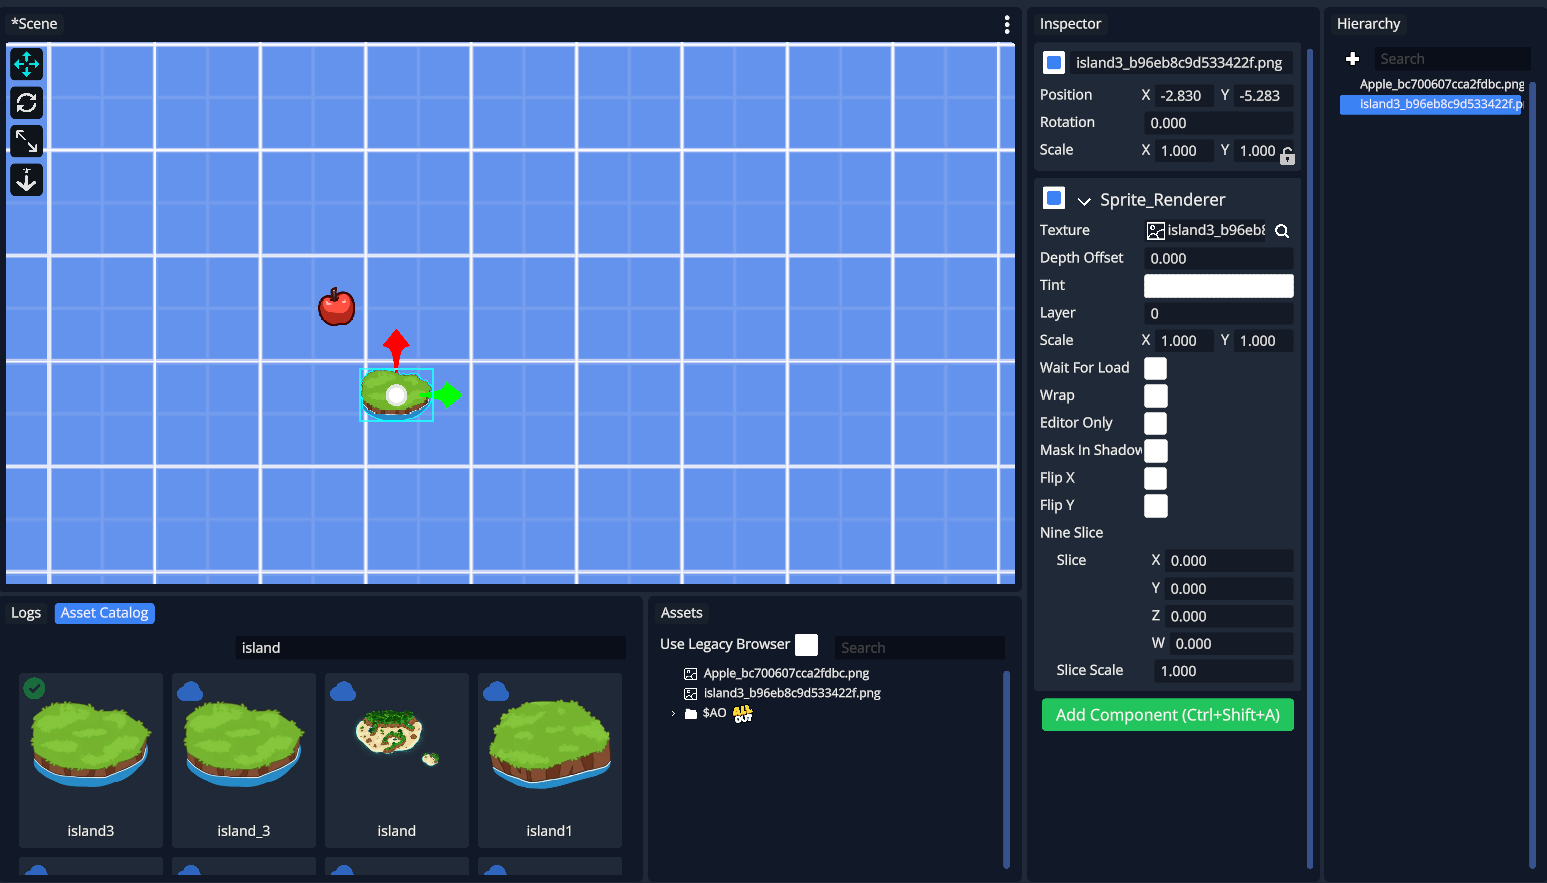
1. Search for an Apple and an Island in the [Asset Catalog](/using-the-editor/asset-catalog.md) and drag them into your game's scene view.
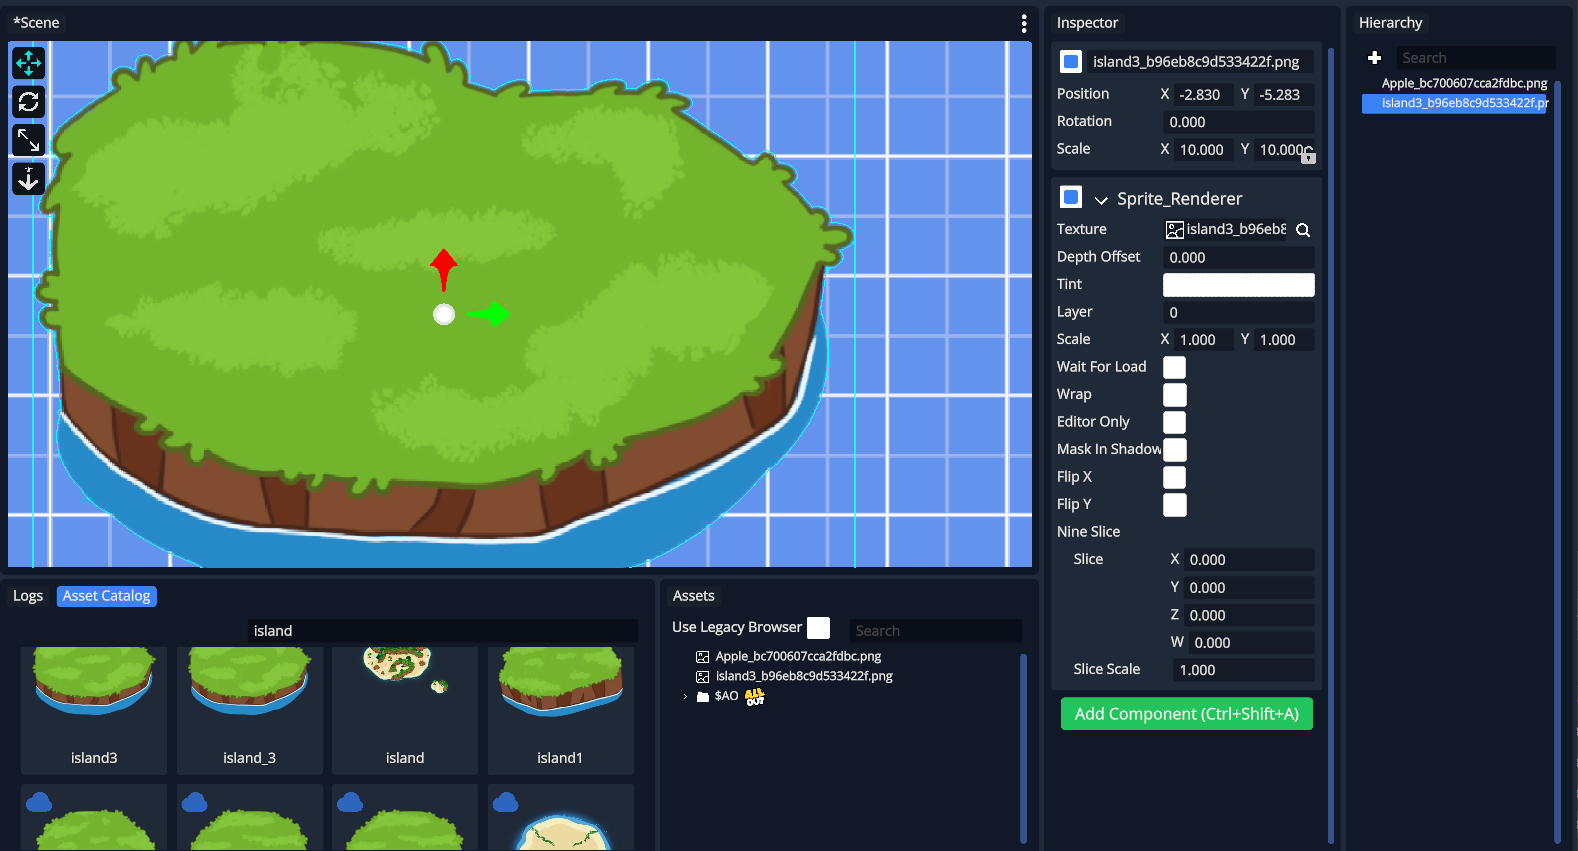
2. That island is pretty small! In the [Inspector](/using-the-editor/inspector.md) set the `Scale` to 10x10 to make it bigger
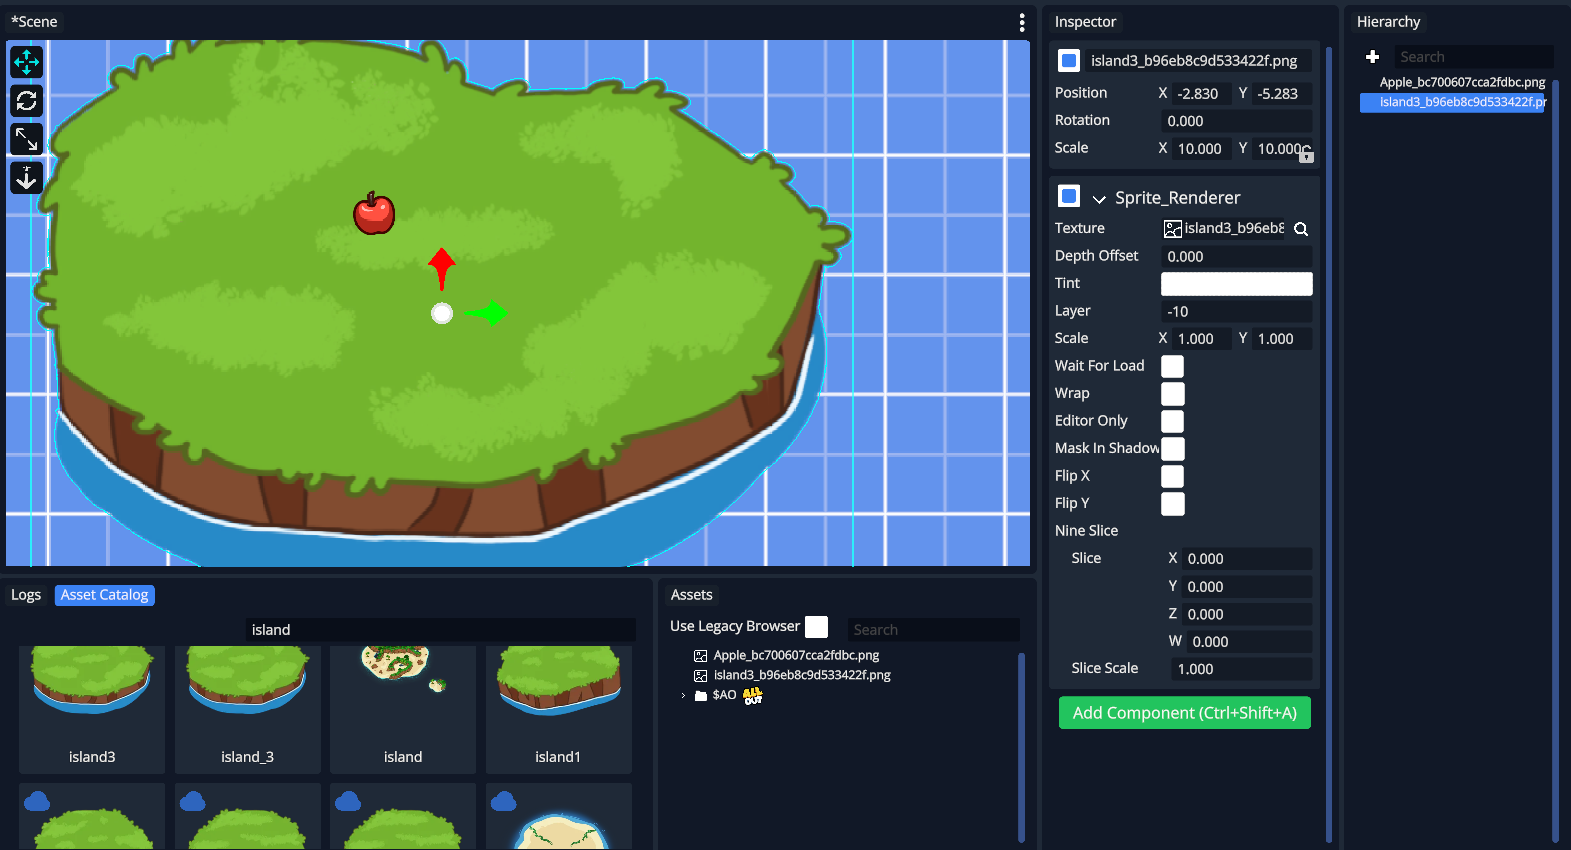
3. Now the island is a good size, but the apple is behind the island! Set the island's `Layer` to -10 to push it behind everything else.
#### Adding Scripts
In your game project's `scripts` directory, create a new file called `pickup_apple.csl` and open it in a text editor or use an [AI based IDE](/scripting/cursor-claude-antigravity-setup.md).
Paste the following example script and save the file:
```go
// This creates the component that makes the apple interactable,
// we'll add it to the Apple in the next step of the tutorial.
Pickup_Apple :: class : Interactable {
is_picked_up: bool;
ao_start :: method() {
this.set_listener(this);
this.set_text("Pick up");
}
can_use :: method(player: Player) -> bool {
if is_picked_up return false;
return true;
}
on_interact :: method(player: Player) {
if is_picked_up return;
is_picked_up = true;
// Start the pop effect
effect := new(Apple_Pop_Effect);
entity.set_active_effect(effect);
}
}
// A cool animation for when you eat it :D
Apple_Pop_Effect :: class : Effect_Base {
sprite: Sprite_Renderer;
start_scale: v2;
start_pos: v2;
effect_start :: method() {
sprite = entity.get_component(Sprite_Renderer);
start_scale = entity.local_scale;
start_pos = entity.local_position;
set_duration(0.4);
}
effect_update :: method(dt: float) {
t := get_elapsed_time() / 0.4;
// Scale up then quickly shrink to nothing
scale_curve: float;
if t < 0.3 {
// Quick pop up (scale to 1.3x)
scale_curve = lerp(1.0, 1.3, Ease.out_back(t / 0.3));
} else {
// Shrink to nothing
scale_curve = lerp(1.3, 0.0, Ease.in_back((t - 0.3) / 0.7));
}
entity.set_local_scale(start_scale * scale_curve);
// Float upward slightly
rise := Ease.out_quad(t) * 0.5;
entity.set_local_position({start_pos.x, start_pos.y + rise});
// Fade out near the end
if sprite != null {
alpha := 1.0 - Ease.in_quad(max(0.0, (t - 0.5) / 0.5));
sprite.color.w = alpha;
}
}
effect_end :: method(interrupt: bool) {
entity.destroy();
}
}
```
> Saving a CSL file is detected and compiled automatically. In a running test, press **Alt+F9** to manually hot-load the compiled scripts. Stop and restart for scene changes. **Ctrl+R** reloads the whole editor project and is not required for normal script compilation.
#### Adding the Apple component
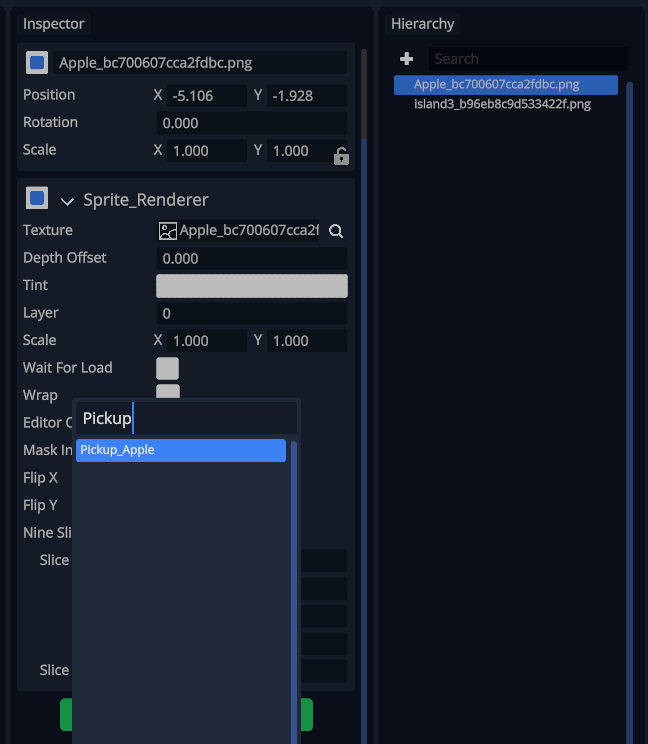
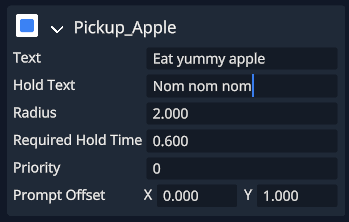
Now that you've created your apple script, we'll need to apply it to the apple in the scene. To do that, we'll add the new `Pickup_Apple` component from the script by using the Inspector.
1. Select your Apple in the scene.
2. Click the "Add Component" button in the Inspector.
3. Search for the "Pickup\_Apple" component and click it to add it to the apple.
Now you'll see the component has been added to the apple! You can adjust some fields from the Apple by changing the values in the inspector:
#### Playing your game
When you're ready, hit the fun green triangle and try your game!
### Next Steps
In the next sections, you'll learn how to playtest your game with multiple players, create your own scripts, and build your dream world.
**Here are some challenges to try:**
* Make many apples for the player to eat
* Play sound effects when eaten
* **Advanced:** try writing a script to respawn more apples after they're eaten
\--
{% hint style="info" %}
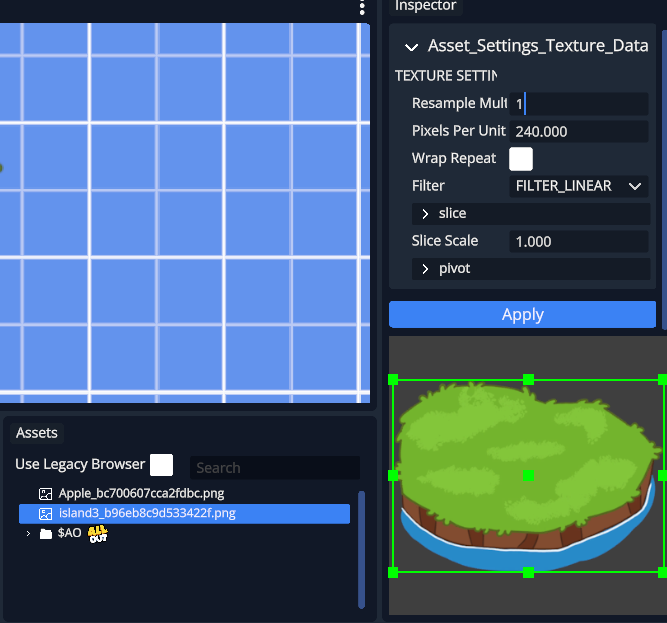
SIDE NOTE: If your island is low resolution/pixelated, click the island's png asset in the "Assets" section and set the Resample Multiplier to 1 and click Apply
{% endhint %}

 {% endhint %}